Here is a complete, step-by-step guide on how to create a token on LetsBonk, along with crucial information you need to know before you start.
⚠️ Important Disclaimer: Read This First!
-
No Coding Required: LetsBonk provides a user-friendly interface, so you don't need to be a programmer.
-
Cost: You will need a small amount of BONK in your wallet to pay for the gas fees for the deployment transaction.
-
Responsibility: Creating a token is easy; building a trustworthy project and community is hard. Many tokens fail.
-
Scam Potential: Be extremely cautious. The same tool that lets you create a legitimate token can be used to create scam "honeypot" or "rug pull" tokens. Never invest in random tokens without doing your own research.
-
Permanent Actions: Once you create the token, certain parameters like the total supply are permanent and cannot be changed.
Step-by-Step Guide to Creating a Token on LetsBonk
Step 1: Preparation
-
Get a Wallet: You need a Solana-compatible wallet like Phantom, Solflare, or Backpack. Make sure it's set up and secured with your recovery phrase.
-
Fund Your Wallet with BONK: You need a small amount of BONK on the BonkChain to pay for gas fees. You can get BONK from major centralized (CEX) or decentralized (DEX) exchanges. Make sure you have BONK on the BonkChain network, not just the Solana mainnet (they are different). A few thousand BONK is more than enough for multiple deployments.
-
Go to the LetsBonk Website: Navigate to the official LetsBonk website: https://letsbonk.app
Step 2: Connect Your Wallet
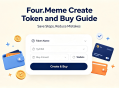
On the LetsBonk homepage, click the "Connect Wallet" button. A pop-up will appear from your wallet extension. Select your wallet and authorize the connection to the LetsBonk website.
Step 3: Navigate to the Token Creator
Once connected, look for a section or tab called "Create Token", "Token Factory", or something similar. This is the core tool you'll be using.
Step 4: Fill in the Token Details
This is the most critical part. You will need to define the properties of your token. Here's what each field typically means:
-
Token Name: The full name of your token (e.g., "My Awesome Coin").
-
Token Symbol: The short ticker symbol (e.g., "AWESOME"). Usually 3-5 characters.
-
Description: A brief explanation of what your token is for.
-
Total Supply: The total number of tokens that will ever exist. (e.g., 1,000,000,000). Be careful, this is permanent.
-
Decimals: This defines the divisibility of your token. For most meme coins, this is set to 6. A value of 6 means the smallest unit of your token is 0.000001. Setting it to 0 means your token is not divisible (like a non-fungible ticket).
-
Logo/Image URL: A link to your token's icon. It should be a direct link to a square image (e.g., a PNG file hosted on a service like Imgur, or your own website).
-
Website & Twitter (Optional): Links to your project's official socials and website. This adds legitimacy.
-
Revoke Mint Authority (CRITICAL): YOU MUST CHECK THIS BOX. This action is irreversible and will prevent you (or anyone else) from ever creating more tokens after the initial launch. If you do not check this, your token will be seen as an obvious scam because the creator can inflate the supply at any time.
-
Revoke Freeze Authority (Recommended): It is highly recommended to check this box as well. This prevents you from being able to "freeze" tokens in someone's wallet, which is a centralizing and untrustworthy power.
Step 5: Review and Create
Double-check all the information you've entered. Is the name and symbol correct? Is the total supply what you intended? Did you check the "Revoke Mint Authority" box?
Once you are 100% sure, click the "Create Token" or "Deploy Token" button.
Step 6: Confirm the Transaction
Your wallet (e.g., Phantom) will pop up asking you to confirm the transaction and pay the gas fee in BONK. Review the transaction details and approve it.
Step 7: Wait for Confirmation
The BonkChain is very fast. Within seconds, your transaction should be confirmed. You will receive a success message and a transaction ID (TXID). You can click this TXID to view your token's creation on the BonkChain explorer.
Congratulations! Your token now exists on the blockchain.
What to Do After Creating Your Token
Creating the token is just the beginning. Now you have to manage it.
-
Add Liquidity on a DEX: A token without liquidity is useless. You need to create a trading pair (e.g., AWESOME/BONK) on a decentralized exchange like BonkBots or Raydium on BonkChain. This requires you to provide both your new token and an equal value of BONK. This is a separate process from token creation and carries the risk of "impermanent loss."
-
Create a Social Presence: Make a Twitter/X account and a Telegram group for your community.
-
Get Your Token Listed:
-
On DexScreener: Once you add liquidity, it should appear on DexScreener automatically. You can then "claim" the pair page to add more info and social links.
-
On LetsBonk itself: There is usually a "List Token" section on LetsBonk where you can submit your token's contract address to be featured in their list.
Finding Your Token's Contract Address
This is your token's unique identifier on the blockchain. You can find it by:
-
Clicking the transaction ID link after creation.
-
Looking in your wallet's "Activity" tab for the "Create Token" transaction.
-
Going to the "Manage" or "My Tokens" section on LetsBonk if they have one.
You will need this address for everything: adding liquidity, listing on trackers, and sharing it with potential holders.
By following these steps carefully, you can successfully create and launch your own token on the BonkChain using LetsBonk. Good luck, and always prioritize building a fair and transparent project.