Creating your own token on the Solana blockchain is an exciting way to participate in the world of cryptocurrency. Whether you're launching a community token, a governance asset, or the foundation for a new project, Solana offers fast transaction speeds and low costs that make it an attractive platform. Here's a comprehensive guide to creating your own Solana token.
Understanding Solana Tokens
Before diving into creation, it's important to understand that Solana supports two main types of tokens:
1. SPL Tokens - The standard token format similar to ERC-20 on Ethereum
2. Native SOL - The base currency of the Solana network
We'll be focusing on creating SPL tokens, which are customizable and can represent anything from currencies to loyalty points.
Prerequisites
To create a Solana token, you'll need:
- A Solana wallet (Phantom, Solflare, or Sollet recommended)
- Some SOL for transaction fees (0.1-0.5 SOL should suffice)
- Basic familiarity with command line interfaces
- Node.js installed on your computer (version 14 or higher)
Two Ways to Create a Solana Token
You can create a token on Solana using either:
1.Command-line tools (technical approach). This approach requires a complex technical process, therefore is not friendly for users that do not have any technical expertise.
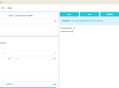
2.Online platforms (no-code approach). This approach involves using a Solana token creator, which is a no-code token generator such as GTokenTool.
We’ll dive into each method below.
Step 1: Set Up Your Development Environment
First, install the required tools:
```bash
npm install -g @solana/spl-token @solana/web3.js
```
Then install the Solana CLI tools:
```bash
sh -c "$(curl -sSfL https://release.solana.com/stable/install)"
```
Verify your installation with:
```bash
solana --version
spl-token --version
```
Step 2: Connect to the Solana Network
Configure your CLI to connect to the Solana devnet (for testing):
```bash
solana config set --url https://api.devnet.solana.com
```
Or for mainnet (when you're ready to deploy):
```bash
solana config set --url https://api.mainnet-beta.solana.com
```
Step 3: Create Your Wallet
If you haven't already, create a wallet and fund it with some SOL:
```bash
solana-keygen new --outfile ~/.config/solana/my_wallet.json
solana airdrop 1
```
This creates a new wallet and airdrops 1 SOL (on devnet only - mainnet requires purchasing SOL).
Step 4: Create Your Token
Now for the main event - creating your token:
```bash
spl-token create-token --decimals 9
```
The `--decimals` flag sets how divisible your token will be (9 is standard for most Solana tokens). This command will output your new token's mint address - save this carefully.
Step 5: Create Token Accounts
To actually hold your new token, you need to create an associated account:
```bash
spl-token create-account YOUR_TOKEN_MINT_ADDRESS
```
Step 6: Mint Your Tokens
Now you can mint your initial supply (example for 1,000,000 tokens):
```bash
spl-token mint YOUR_TOKEN_MINT_ADDRESS 1000000
```
Step 7: (Optional) Configure Token Properties
You may want to:
1. Disable future minting (make supply fixed):
```bash
spl-token authorize YOUR_TOKEN_MINT_ADDRESS mint --disable
```
2. Set metadata (name, symbol, etc.) using Metaplex's Token Metadata program
Step 8: Verify Your Token
Check your token balance:
```bash
spl-token accounts
```
Or view it in your Solana wallet by adding the token mint address.
Advanced Options
For a more professional token launch, consider:
1. Creating a website for your token
2. Adding liquidity to a DEX like Raydium or Orca
3. Developing smart contracts to add functionality
4. Creating a token logo and proper metadata
Important Considerations
- Legal Compliance: Ensure your token complies with regulations in jurisdictions where it will be available
- Security: Audit any smart contracts and keep your wallet keys secure
- Utility: Design your token with clear use cases to give it real value
Conclusion
Creating a token on Solana is relatively straightforward thanks to its efficient blockchain and robust tooling. While the technical process can be completed in minutes, remember that a successful token requires careful planning around its economics, utility, and community. Whether you're experimenting or launching a serious project, Solana provides an excellent platform for token creation.
Would you like more detailed information about any specific part of this process?